This article explains how to use IPMIView to access IPMI for dedicated servers equipped with this feature. IPMI allows you to control the power status of your server and to view and control the screen, keyboard and mouse of the server. IPMIView is a suitable alternative to accessing the web-based interface and avoids various Java security warnings and errors that may otherwise appear. Like with the web-based IPMI, you must first be connected to the Internal Network VPN as described in this article.
This software will only work properly for certain servers if used with the Java 7 JRE. Version 1.7.0_79 is bundled with the current packages dated 20151223. If you try to change the Java version included with the downloads, IPMIView may no longer function as expected.
Software Download & Installation
You can download a copy of the IPMIView software from here:
Currently the software is supported for Windows, MacOS X, and Linux.
IPMIView is also available for iOS and Android devices, but it has not been tested extensively:
- iOS: https://itunes.apple.com/us/app/supermicro-ipmiview/id952163566?mt=8
- Android: https://play.google.com/store/apps/details?id=com.smc.smcipmitool
Windows Installation
Download the Windows installer here and run it.
The installation will create a program group called SUPERMICRO on the Start Menu.
You must use the Run as Administrator option for the interface to load properly.
Linux Installation
Download the appropriate tar file, depending on your OS architecture:
- 64-bit: IPMIView_V2.11.0_bundleJRE_Linux_x64_20151223.tar.gz
- 32-bit: IPMIView_V2.11.0_bundleJRE_Linux_20151223.tar.gz
Extract the downloaded file from a terminal window and switch to the extracted directory:
tar -xzf IPMIView_V2.11.0_bundleJRE_Linux_x64_20151223.tar.gz
cd IPMIView_V2.11.0_bundleJRE_Linux_x64_20151223
Then run the following command to start the program:
./IPMIView20
Mac OS X Installation
Download the MacOS file here.
Extract the downloaded file from a terminal window and switch to the extracted directory:
tar -xzf IPMIView_V2.11.0_bundleJRE_MacOS_x64_20151223.tar.gz
cd IPMIView_V2.11.0_bundleJRE_MacOS_x64_20151223
Then run the following command to start the program:
./IPMIView20
Note that this download was produced by Steadfast and is not supported by Supermicro.
Official Downloads
The original official download location of the software is the Supermicro FTP site:
Usage
To access an IPMI console, you must add the system, then log in and select the KVM Console tab. This series of screenshots provides an illustrated step-by-step process:
- Start the application and select the
![Ipmiview-2-button-new.png]() (New system) button from the toolbar:
(New system) button from the toolbar:![Ipmiview-1-toolbar.png]()
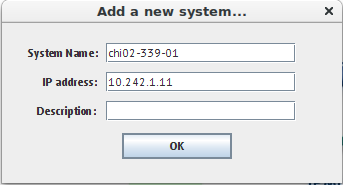
- Enter a Name and IP for the system you are adding. Please note that the values below are an example. You must enter the information for your own server in the boxes.
![Ipmiview-3-addsystem.png]()
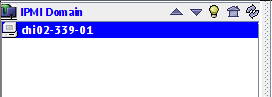
- From the IPMI Domain list on the left side of the application, double click the system to be accessed:
![Ipmiview-4-ipmidomainlist.png]()
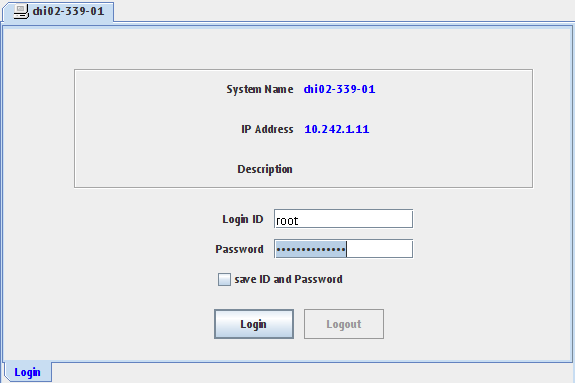
- Enter the login information for the IPMI controller:
![Ipmiview-5-login.png]()
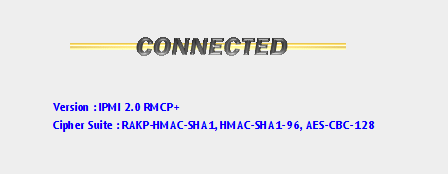
- Click Login and look for the "Connected" banner, which should look like this:
![Ipmiview-6-connected.png]()
- Once logged in, select the "KVM Console" tab from the bottom of the application:
![Ipmiview-7-console.png]()
 (New system) button from the toolbar:

Please note that the tabs may vary depending on the IPMI controller hardware.
If you have any trouble using IPMIView, please contact support and let us know the steps you have taken and any error messages you have received.


